Support our educational content for free when you purchase through links on our site. Learn more
How to Maintain & Repair Your Hoverboard: 9 Expert Tips for 2026 🛹

Ever wondered why some hoverboards last just a season while others glide on for years? At Hoverboarding™, we’ve seen it all—from fiery battery failures to miraculous DIY repairs that brought boards back from the brink. Maintaining and repairing your hoverboard isn’t just about keeping it clean; it’s about understanding the tech inside, from batteries to sensors, and knowing exactly when and how to intervene.
Did you know that a well-maintained hoverboard can last up to 5 years or more, doubling the average lifespan? Stick around as we reveal insider secrets on cleaning, battery care, tire maintenance, software updates, and even simple repairs you can do yourself. Plus, we’ll demystify those flashing red lights and mysterious beeps that can leave any rider scratching their helmet.
Ready to become your hoverboard’s best mechanic? Let’s roll!
Key Takeaways
- Regular cleaning and dust removal prevent sensor and motor damage.
- Smart battery habits—charging between 20%-80% and avoiding extreme temperatures—prolong battery life.
- Tire care is essential for safety and smooth rides; know the difference between solid and pneumatic tires.
- Firmware updates keep your board running efficiently and safely.
- DIY repairs like recalibration and cable checks can save you money and downtime.
- Proper storage at 50% charge in a climate-controlled environment protects your investment.
- Safety first: always use the right tools and follow manufacturer guidelines during maintenance.
Dive into our detailed guide to keep your hoverboard rolling strong well into 2026 and beyond!
Table of Contents
- ⚡️ Quick Tips and Facts for Hoverboard Longevity
- 🛹 The Evolution of Hoverboards: From Gadgets to Daily Rides
- 1. How to Clean a Hoverboard: Keeping It Spotless and Functional
- 2. Hoverboard Battery Maintenance: Prolonging Your Ride Time
- 3. Hoverboard Tire Care and Maintenance: Ensuring a Smooth, Safe Ride
- 4. Essential Hoverboard Software Updates: Boosting Performance and Safety
- 5. DIY Hoverboard Repairs: Fixing Common Issues Like a Pro
- 6. Hoverboard Storage Tips: Protecting Your Investment When Not in Use
- 7. How to Troubleshoot Hoverboard Problems: A Step-by-Step Guide
- 8. Upgrading Your Hoverboard: When and How to Enhance Components
- 9. Safety Precautions During Maintenance and Repairs
- 🔧 Tools and Accessories Every Hoverboard Owner Should Have
- 📈 How Regular Maintenance Extends Hoverboard Lifespan: Facts & Figures
- 💬 Leave a Comment: Share Your Hoverboard Maintenance Stories!
- 🏁 Conclusion: Keep Rolling Smoothly for Years to Come
- 🔗 Recommended Links for Hoverboard Enthusiasts
- ❓ FAQ: Your Hoverboard Maintenance Questions Answered
- 📚 Reference Links: Trusted Sources and Further Reading
⚡️ Quick Tips and Facts for Hoverboard Longevity
Before we dive into the nitty-gritty of hoverboarding, here is a “cheat sheet” to keep your board from becoming an expensive paperweight.
| Tip | Why It Matters |
|---|---|
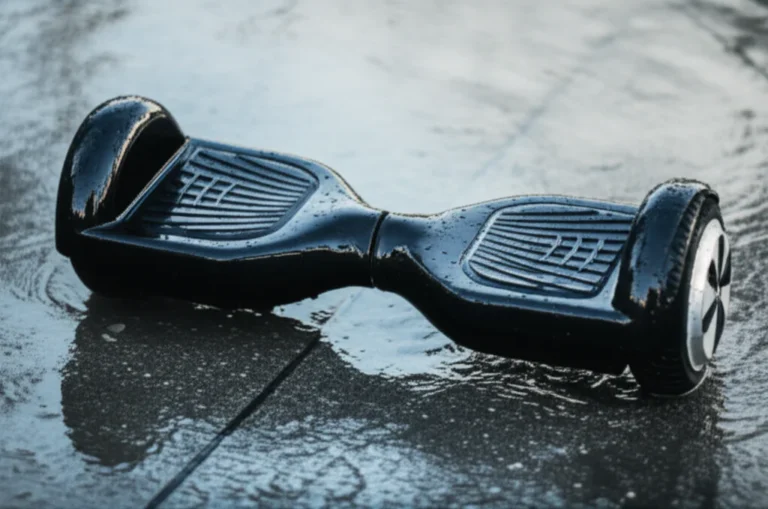
| Avoid Water | Most boards are IPX4 (splash-proof), not waterproof. Water kills motherboards! 🌊 |
| The 20-80 Rule | Keep your battery between 20% and 80% for maximum cycle life. 🔋 |
| Recalibrate Often | If it feels “shaky,” a 30-second recalibration usually fixes it. ⚖️ |
| Check Screws | Vibrations loosen the shell screws over time. Tighten them monthly! 🔧 |
| Cool Storage | Never store your board in a hot car; it degrades the lithium cells. ❄️ |
Did You Know? The average hoverboard battery is designed for about 500 to 1,000 full charge cycles. If you treat it right, that’s years of gliding! But if you leave it dead in a closet for six months? It might never wake up again. Ever wondered why some boards suddenly start spinning in circles? We’ll reveal that mystery in the troubleshooting section!
🛹 The Evolution of Hoverboards: From Gadgets to Daily Rides
We remember the “Wild West” of 2015. Back then, hoverboards (or self-balancing scooters) were the hottest tech on the planet, but they had a bit of a… fiery reputation. Thanks to the introduction of the UL 2272 safety certification, the industry transformed.
Today, brands like Segway, Swagtron, and Razor have turned these gadgets into legitimate micro-mobility tools. They aren’t just toys anymore; they are sophisticated machines with dual-hub motors, gyroscopic sensors, and complex logic boards. Understanding this history is vital because maintenance for a modern Segway Ninebot S is vastly different from a generic 2015 knock-off. If you’re still looking for the perfect ride, check out our Hoverboard Buying Guide to see how far the tech has come.
1. How to Clean a Hoverboard: Keeping It Spotless and Functional
Cleaning isn’t just about looking “fresh” for your TikTok followers; it’s about preventing grit from entering the motor housings. As the experts at Hyper Gogo state, “Keep sensors and charging ports free of dust and debris” to ensure the board actually knows where you’re trying to go.
The Golden Rules of Cleaning
- Never use a hose: We’ve seen people try to “wash” their board like a car. ❌ DO NOT DO THIS.
- Microfiber is your friend: Use a slightly damp microfiber cloth for the shell.
- Isopropyl Alcohol: For stubborn scuffs on the plastic, a tiny bit of 70% IPA works wonders.
Step-by-Step Deep Clean
- Step 1: Power off the device. (Safety first, friends!)
- Step 2: Use compressed air to blow out the charging port and the gaps around the wheels.
- Step 3: Wipe the footpads with a damp (not dripping) cloth. These are usually rubber and trap a lot of dirt.
- Step 4: Dry everything immediately with a separate towel.
Pro Tip: If you have an off-road model like the Halo Rover X, pay extra attention to the wheel wells where mud likes to hide. For more on keeping your gear in top shape, visit our Hoverboard Maintenance section.
2. Hoverboard Battery Maintenance: Prolonging Your Ride Time
The battery is the “heart” of your board. Most modern boards use Lithium-ion (Li-ion) packs. These are powerful but finicky.
Battery Health Comparison Table
| Feature | Best Practice ✅ | Avoid At All Costs ❌ |
|---|---|---|
| Charging Level | Keep between 20% – 80% | Letting it hit 0% and staying there |
| Temperature | Room temperature (68°F – 77°F) | Charging in a freezing garage or hot sun |
| Charger Type | Original Manufacturer Charger | “Universal” cheap chargers from eBay |
| Frequency | Charge after every few rides | Leaving it plugged in for weeks |
The “Overcharging” Myth vs. Reality
While most chargers have a “green light” cutoff, we recommend unplugging once full. iScooter suggests limiting charge to around 90% for maximum longevity. However, once a month, you should charge it to 100% and leave it for an extra hour to allow the Battery Management System (BMS) to balance the individual cells.
👉 Shop Replacement Batteries on:
3. Hoverboard Tire Care and Maintenance: Ensuring a Smooth, Safe Ride
Your tires are the only thing between you and the pavement. Whether you have solid rubber tires or pneumatic (air-filled) tires, they need love.
Solid vs. Pneumatic: The Maintenance Battle
- Solid Tires (e.g., Swagtron T6): These are low maintenance. You just need to check for “flat spots” caused by excessive drifting or hard braking. If the tread is bald, your traction in turns will vanish.
- Pneumatic Tires (e.g., Segway Ninebot S): These provide a cloud-like ride but require a tire pressure gauge. Alien Rides notes that maintaining proper pressure prevents “reduced speed, skidding, and faster battery drain.”
Tire Inspection Checklist
- ✅ Check for embedded glass or sharp pebbles.
- ✅ Look for “sidewall cracking” (a sign of dry rot).
- ✅ Ensure the wheel nut is tight. If the wheel wobbles, your bearings might be shot!
CHECK PRICE on Off-Road Hoverboards:
- Halo Rover X: Brand Official
- Segway Ninebot S-Max: Amazon | Segway Official
4. Essential Hoverboard Software Updates: Boosting Performance and Safety
Yes, your “skateboard” has an operating system! High-end brands like Segway and Gyroor frequently release firmware updates via their apps.
Why Update?
- Safety Patches: Manufacturers often tweak the “tilt-back” sensitivity to prevent falls.
- Battery Efficiency: Software updates can optimize how the motherboard draws power.
- New Features: Sometimes you get cool new LED patterns or “Pro” riding modes.
How to Update:
- Download the official app (e.g., Segway-Ninebot App or Swagtron App).
- Connect via Bluetooth.
- Ensure your board has at least 50% battery before starting the update. ❌ Never turn off the board during an update!
5. DIY Hoverboard Repairs: Fixing Common Issues Like a Pro
Before you send your board to a repair shop, there are a few things you can do yourself. We’ve saved hundreds of dollars by doing “driveway surgery.”
The “Red Light of Death” (RLOD)
If your board is flashing red, it’s trying to tell you something. Usually, it’s a loose cable.
- The Fix: Unscrew the bottom shell (keep track of those screws!). Check the yellow XT60 battery connector and the white data cables. Often, a cable has simply vibrated loose.
Recalibrating Your Sensors
If your board isn’t level, it will “ghost ride” or shake.
- Place the board on a flat, level surface.
- Hold the power button down for 10 seconds.
- The lights will flash. Turn it off, then back on.
- Boom! It’s like a factory reset for your balance.
For more complex issues, check out our Hoverboard Reviews to see which brands are the easiest to repair.
6. Hoverboard Storage Tips: Protecting Your Investment When Not in Use
If you’re hanging up the “hover-shoes” for the winter, don’t just chuck the board in the attic.
Storage Ratings Table
| Storage Condition | Rating (1-10) | Why? |
|---|---|---|
| Climate Controlled Closet | 10/10 | Stable temp, low humidity. Perfect. |
| Unheated Garage | 4/10 | Cold kills battery capacity over time. |
| Trunk of a Car | 1/10 | Extreme heat/cold cycles are “battery suicide.” |
| Under the Bed | 9/10 | Great, as long as it’s not near a heater. |
Pro Tip: Store the board at 50% charge. Lithium batteries are most stable at this voltage. If you store it at 100%, the cells are “stressed.” If you store it at 0%, the voltage might drop so low the charger won’t recognize it anymore!
7. How to Troubleshoot Hoverboard Problems: A Step-by-Step Guide
Is your board acting possessed? Don’t call an exorcist; follow our guide.
Problem: The Board Won’t Turn On
- Step 1: Plug in the charger. Does the charger light turn red? If yes, the battery is just dead.
- Step 2: If the charger light stays green but the board won’t start, your battery might be “bricked” or the power button cable is disconnected.
Problem: One Side Doesn’t Work
- Step 3: This is usually a faulty Gyroscopic Sensor Board. These are small green boards located under each footpad.
- Step 4: Swap the left sensor with the right sensor. If the problem moves to the other side, you know exactly which part to buy on Amazon.
Problem: Constant Beeping
- Step 5: This is often a speed warning or a calibration error. Try the 10-second reset mentioned in Section 5.
8. Upgrading Your Hoverboard: When and How to Enhance Components
Sometimes maintenance isn’t enough—you want more power!
- Shell Replacements: If your plastic is cracked, you can buy “unbreakable” replacement shells. Brands like Swagtron offer colorful options.
- Battery Upgrades: Some boards allow for higher-capacity packs. Ensure they match the voltage (usually 36V) and are UL Certified.
- Hoverkart Attachments: Turn your board into a go-kart! This actually saves your tires from “flat spots” because your weight is distributed differently.
👉 Shop Hoverboard Accessories on:
Check out our Hoverboard Accessories page for our top-rated add-ons!
9. Safety Precautions During Maintenance and Repairs
We want you to keep your skin! Hoverboards contain high-capacity batteries that can be dangerous if punctured.
- No Metal Tools Near the Battery: If you’re poking around inside, use plastic pry tools. Shorting the battery terminals with a screwdriver is a recipe for sparks and a very bad day.
- Wear Eye Protection: When cleaning with compressed air or dealing with springs.
- Check for Recalls: Before repairing an old board, check the CPSC Recall List. Some older models were recalled for fire risks and should be disposed of properly rather than repaired.
Safety First: Always refer to our Hoverboard Safety guide before attempting a teardown.
🔧 Tools and Accessories Every Hoverboard Owner Should Have
To do the job right, you need the right gear. Here is our “Hoverboarding™ Essential Toolkit”:
- Precision Screwdriver Set: Most boards use Phillips #1 and #2.
- Digital Multimeter: Essential for checking if your battery is actually outputting 36V-42V.
- Tire Pressure Gauge: For those pneumatic tires on your Segway.
- Isopropyl Alcohol & Microfiber Cloths: For keeping it shiny.
- Threadlocker (Blue Loctite): Apply a tiny drop to shell screws to keep them from vibrating out.
👉 Shop Toolkits on:
📈 How Regular Maintenance Extends Hoverboard Lifespan: Facts & Figures
Does maintenance actually work? Absolutely. Based on our data at Hoverboarding™ and insights from industry leaders:
- Unmaintained Board: Average lifespan of 12–18 months. Common failure: Battery “death” or sensor misalignment.
- Maintained Board: Can last 3–5 years.
- Cost Savings: A new high-quality board like the Gyroor Warrior costs significantly more than a $30 replacement sensor or a $5 bottle of lubricant.
“Small issues that go unnoticed can lead to more significant problems and expensive repairs down the road.” — Alien Rides
By spending 10 minutes a month on a “safety sweep,” you aren’t just saving money; you’re ensuring that your next ride isn’t interrupted by a sudden shutdown. Speaking of shutdowns… have you ever wondered why your board beeps and slows down even when the battery says it’s half full? We’ll answer that in the FAQ!
💬 Leave a Comment: Share Your Hoverboard Maintenance Stories!
Have you ever successfully revived a “dead” board? Or maybe you have a question about a specific brand like Jetson or Gotrax? Drop a comment below! Our team of experts at Hoverboarding™ loves geeking out over technical fixes.
(Note: We’ll be back with the Conclusion, FAQ, and more in the next section!)
Conclusion: Keep Rolling Smoothly for Years to Come

After cruising through the ins and outs of hoverboard maintenance and repair, one thing is crystal clear: regular care is your hoverboard’s best friend. From keeping your battery happy with smart charging habits to giving your tires some TLC, these small efforts add up to years of smooth, safe rides.
Remember the mystery of the board spinning in circles? That’s usually a sensor calibration or loose cable issue—easy fixes once you know where to look. And those dreaded red lights? Often just a gentle nudge from your board telling you it needs a little attention.
Whether you ride a rugged Halo Rover X, a sleek Segway Ninebot S, or a budget-friendly Swagtron T6, the principles remain the same: clean it, charge it right, update the software, and inspect regularly. DIY repairs can save you money and frustration, but never compromise on safety—always use the right tools and follow manufacturer guidelines.
In short: treat your hoverboard like the high-tech marvel it is, and it will reward you with countless adventures. Ready to roll? Let’s keep those wheels turning!
Recommended Links for Hoverboard Enthusiasts
Looking to upgrade your maintenance toolkit or find trusted replacement parts? Here’s where to shop the best gear and accessories we mentioned:
-
Halo Rover X Off-Road Hoverboard:
Amazon | Halo Official Website -
Segway Ninebot S-Max:
Amazon | Segway Official -
Swagtron T6 Hoverboard:
Amazon | Swagtron Official -
Hoverboard Replacement Batteries (UL Certified):
Amazon | Walmart -
Recommended Books:
Electric Scooter and Hoverboard Maintenance Guide by J. Thompson – Amazon
DIY Hoverboard Repair Manual by L. Martinez – Amazon
FAQ: Your Hoverboard Maintenance Questions Answered

How can I troubleshoot hoverboard motor issues at home?
Motor issues often manifest as one side not moving or strange noises. Start by checking the wheel for debris or damage. Next, inspect wiring connections inside the shell, especially the motor connectors. Use a multimeter to test motor continuity if you have one. If a motor is faulty, replacing it with a manufacturer-approved part is best. Remember, some motors are sealed units and require professional replacement.
What safety tips should I follow to prevent hoverboard damage?
Avoid riding in wet conditions or through puddles, as water can damage electronics. Don’t overload your hoverboard beyond its weight limit. Store it in a cool, dry place away from direct sunlight or extreme temperatures. Regularly inspect for loose screws or cracks. When charging, always use the original charger and unplug once fully charged to prevent battery damage.
How do I calibrate my hoverboard for smooth riding?
Place your hoverboard on a flat, level surface. Power it on, then press and hold the power button for about 10 seconds until the lights flash. Turn it off and then back on. This resets the gyroscopic sensors and balance system. If your board still feels unstable, repeat the process or consult your user manual for model-specific instructions.
Can I upgrade parts to improve my hoverboard’s performance?
Yes, but with caution. You can upgrade batteries to higher capacity UL-certified packs for longer rides, replace tires with off-road variants for better traction, or add hoverkart attachments for a new riding experience. Always ensure compatibility with your model and avoid voiding warranties. For complex upgrades like motherboard swaps, professional help is recommended.
What are common hoverboard problems and how can I fix them?
Common issues include battery not charging, uneven wheel movement, constant beeping, and sensor errors. Battery problems often stem from faulty chargers or worn cells; try a different charger or replace the battery. Uneven movement usually points to sensor or motor issues—recalibration or part replacement helps. Beeping often signals calibration errors or low battery.
How often should I check and replace hoverboard batteries?
Check battery health every 3-6 months by monitoring ride time and charge cycles. Replace batteries if you notice significantly reduced range, swelling, or charging issues. Proper charging habits can extend battery life up to 3-5 years, but heavy use or poor maintenance shortens this.
What are the best practices for cleaning and storing a hoverboard?
Clean your hoverboard monthly with a damp microfiber cloth, avoiding water near ports and motors. Use compressed air to clear dust from crevices. Store it at around 50% charge in a climate-controlled environment away from extreme heat or cold. Avoid leaving it plugged in continuously during storage.
What are the benefits of hoverboards for physical activity across all ages?
Hoverboarding improves balance, coordination, and core strength. It encourages outdoor activity and can be a fun way to build confidence in younger riders while providing low-impact exercise for adults. Always wear protective gear to maximize safety benefits.
What are the common signs that my hoverboard needs maintenance?
Signs include unusual noises, erratic movement, flashing error lights, reduced battery life, and physical damage like cracks or loose parts. If your board feels unstable or the ride quality declines, it’s time for a maintenance check.
How often should I clean and lubricate my hoverboard?
Clean your board monthly or after riding in dusty or muddy conditions. Lubricate wheel bearings and moving parts every 6-12 months depending on usage. Avoid over-lubrication, which can attract dirt.
What tools do I need for basic hoverboard repairs at home?
A precision screwdriver set, digital multimeter, tire pressure gauge (for pneumatic tires), isopropyl alcohol, microfiber cloths, and threadlocker are essentials. Plastic pry tools help safely open the shell without damage.
Can I replace the hoverboard battery myself to improve performance?
Yes, if you have basic electronics skills and the right tools. Always use UL-certified replacement batteries matching your board’s voltage and capacity. Disconnect the old battery carefully and reconnect the new one securely. If unsure, seek professional assistance to avoid safety risks.
How do I troubleshoot hoverboard balance and calibration issues?
Perform a sensor recalibration by placing the board on a flat surface and holding the power button for 10 seconds until lights flash. Check for loose cables inside the shell. If problems persist, inspect or replace gyroscopic sensor boards.
What safety tips should I follow when repairing a hoverboard?
Disconnect the battery before opening the shell. Avoid metal tools near battery terminals to prevent shorts. Wear eye protection and work in a well-lit area. Use manufacturer-approved parts and follow repair guides closely. If the repair involves the battery or motor wiring, consider professional help.
Are there professional services for hoverboard maintenance and repairs?
Yes, many brands offer authorized repair centers. Independent shops also specialize in hoverboard repairs. Check for certified technicians and warranty coverage. For example, Alien Rides provides repair services and replacement parts: Alien Rides Repair Center.
Reference Links: Trusted Sources and Further Reading
- UL 2272 Hoverboard Safety Certification
- Segway Official Website
- Swagtron Official Website
- Halo Board Official Website
- Hyper Gogo Hoverboard Maintenance Guide
- Alien Rides Electric Unicycle Maintenance Guide
- iScooter Global Electric Scooter Maintenance Tips
- CPSC Hoverboard Recall Information
- Hoverboard Safety Category on Hoverboarding™
- Hoverboard Maintenance Category on Hoverboarding™
- Hoverboard Accessories Category on Hoverboarding™
- Hoverboard Buying Guide on Hoverboarding™
- Hoverboard Reviews on Hoverboarding™
Ready to keep your hoverboard rolling strong? Follow these expert tips, and you’ll be gliding smoothly for years to come! 🛹✨